An implant is the closest thing to a natural tooth, but the word procedure makes a lot of people picture something far more involved than it really is. The truth is that an implant is placed over a few short appointments spread across several months, and most of that time is simply the implant fusing quietly with your bone while you go about your life. Knowing the sequence ahead of time takes most of the worry out of it. Here is how it unfolds at our clinic on the Mountain.
Step 1: Your consultation and planning
Everything starts with a visit where we look at the gap, your gums and your overall health. We take a digital scan, which lets us see the bone underneath in three dimensions and plan the exact position and angle of the implant before we touch anything. This stage is where we confirm you have enough healthy bone, talk through your medical history, and answer your questions. If a tooth still needs to come out first, our tooth extraction team plans the removal with the future implant in mind. You leave the consultation with a clear timeline and plan, so there are no surprises.
Step 2: Placing the implant
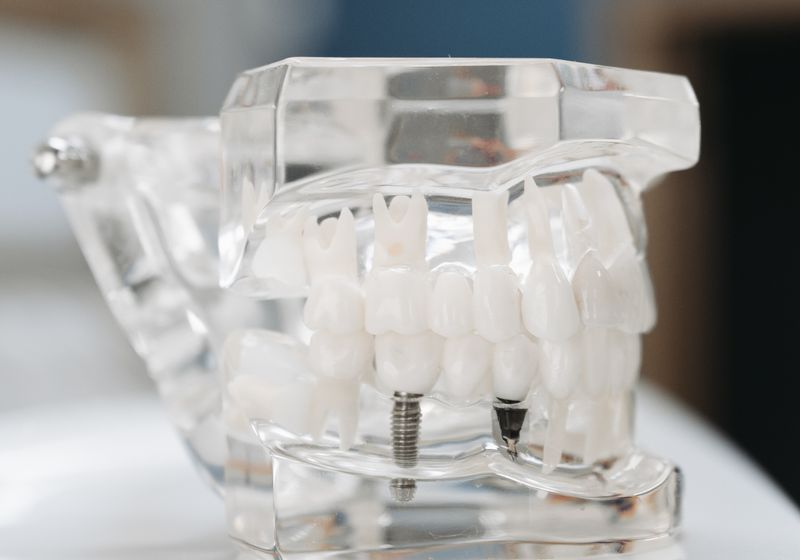
On placement day, we numb the area with local anaesthetic so the appointment itself is comfortable. The titanium post, which acts as the new root, is then gently set into the jawbone in the position we planned. The visit is shorter than most people expect, often under an hour for a single implant. We close the gum over or around the post and send you home with simple aftercare instructions. Most patients have mild soreness for a day or two and manage easily with over-the-counter pain relief.
Step 3: Healing and fusing with the bone
This is the longest stage, and the most important one, but it asks nothing of you beyond normal care. Over roughly three to six months, the bone grows around the titanium post and locks it in place, a process called osseointegration. That biological bond is what gives an implant its remarkable strength and longevity. In most cases we can fit a temporary tooth so you are not walking around with a visible gap, especially if the space shows when you smile. You eat, work and live as usual while the healing happens underneath.
Step 4: Attaching the connector
Once the implant has fused, we attach a small connector, called an abutment, to the top of the post. This is a minor appointment, and the gum is given a short while to settle neatly around it. The connector is what your new crown will sit on. At this visit we also take an impression or scan so your final tooth is made to fit precisely.
Step 5: Fitting your custom crown
The final step is the one you have been waiting for. Your custom crown, matched to the size, shape and shade of your surrounding teeth, is fitted onto the connector. We check that it bites correctly and feels right, make any small adjustments, and then you walk out with a complete smile. From this point you care for it much like a natural tooth: brush, clean around it daily, and keep your regular check-ups.
What to expect afterward
With good home care and routine visits, an implant can last for decades, often a lifetime. The crown on top may eventually need replacing after many years of use, but the implant itself is built to stay. To understand the wider benefits of replacing a missing tooth this way, our team also wrote about how dental implants improve your smile, which covers how implants protect your bite and jawbone. You can read the full treatment details on our dental implants page, and if you are new to us, the new patient page explains what your first visit looks like.
Ready to talk through your options?
Book a dental implant consultation on Hamilton Mountain and we will map out your personal timeline.
Book an Appointment